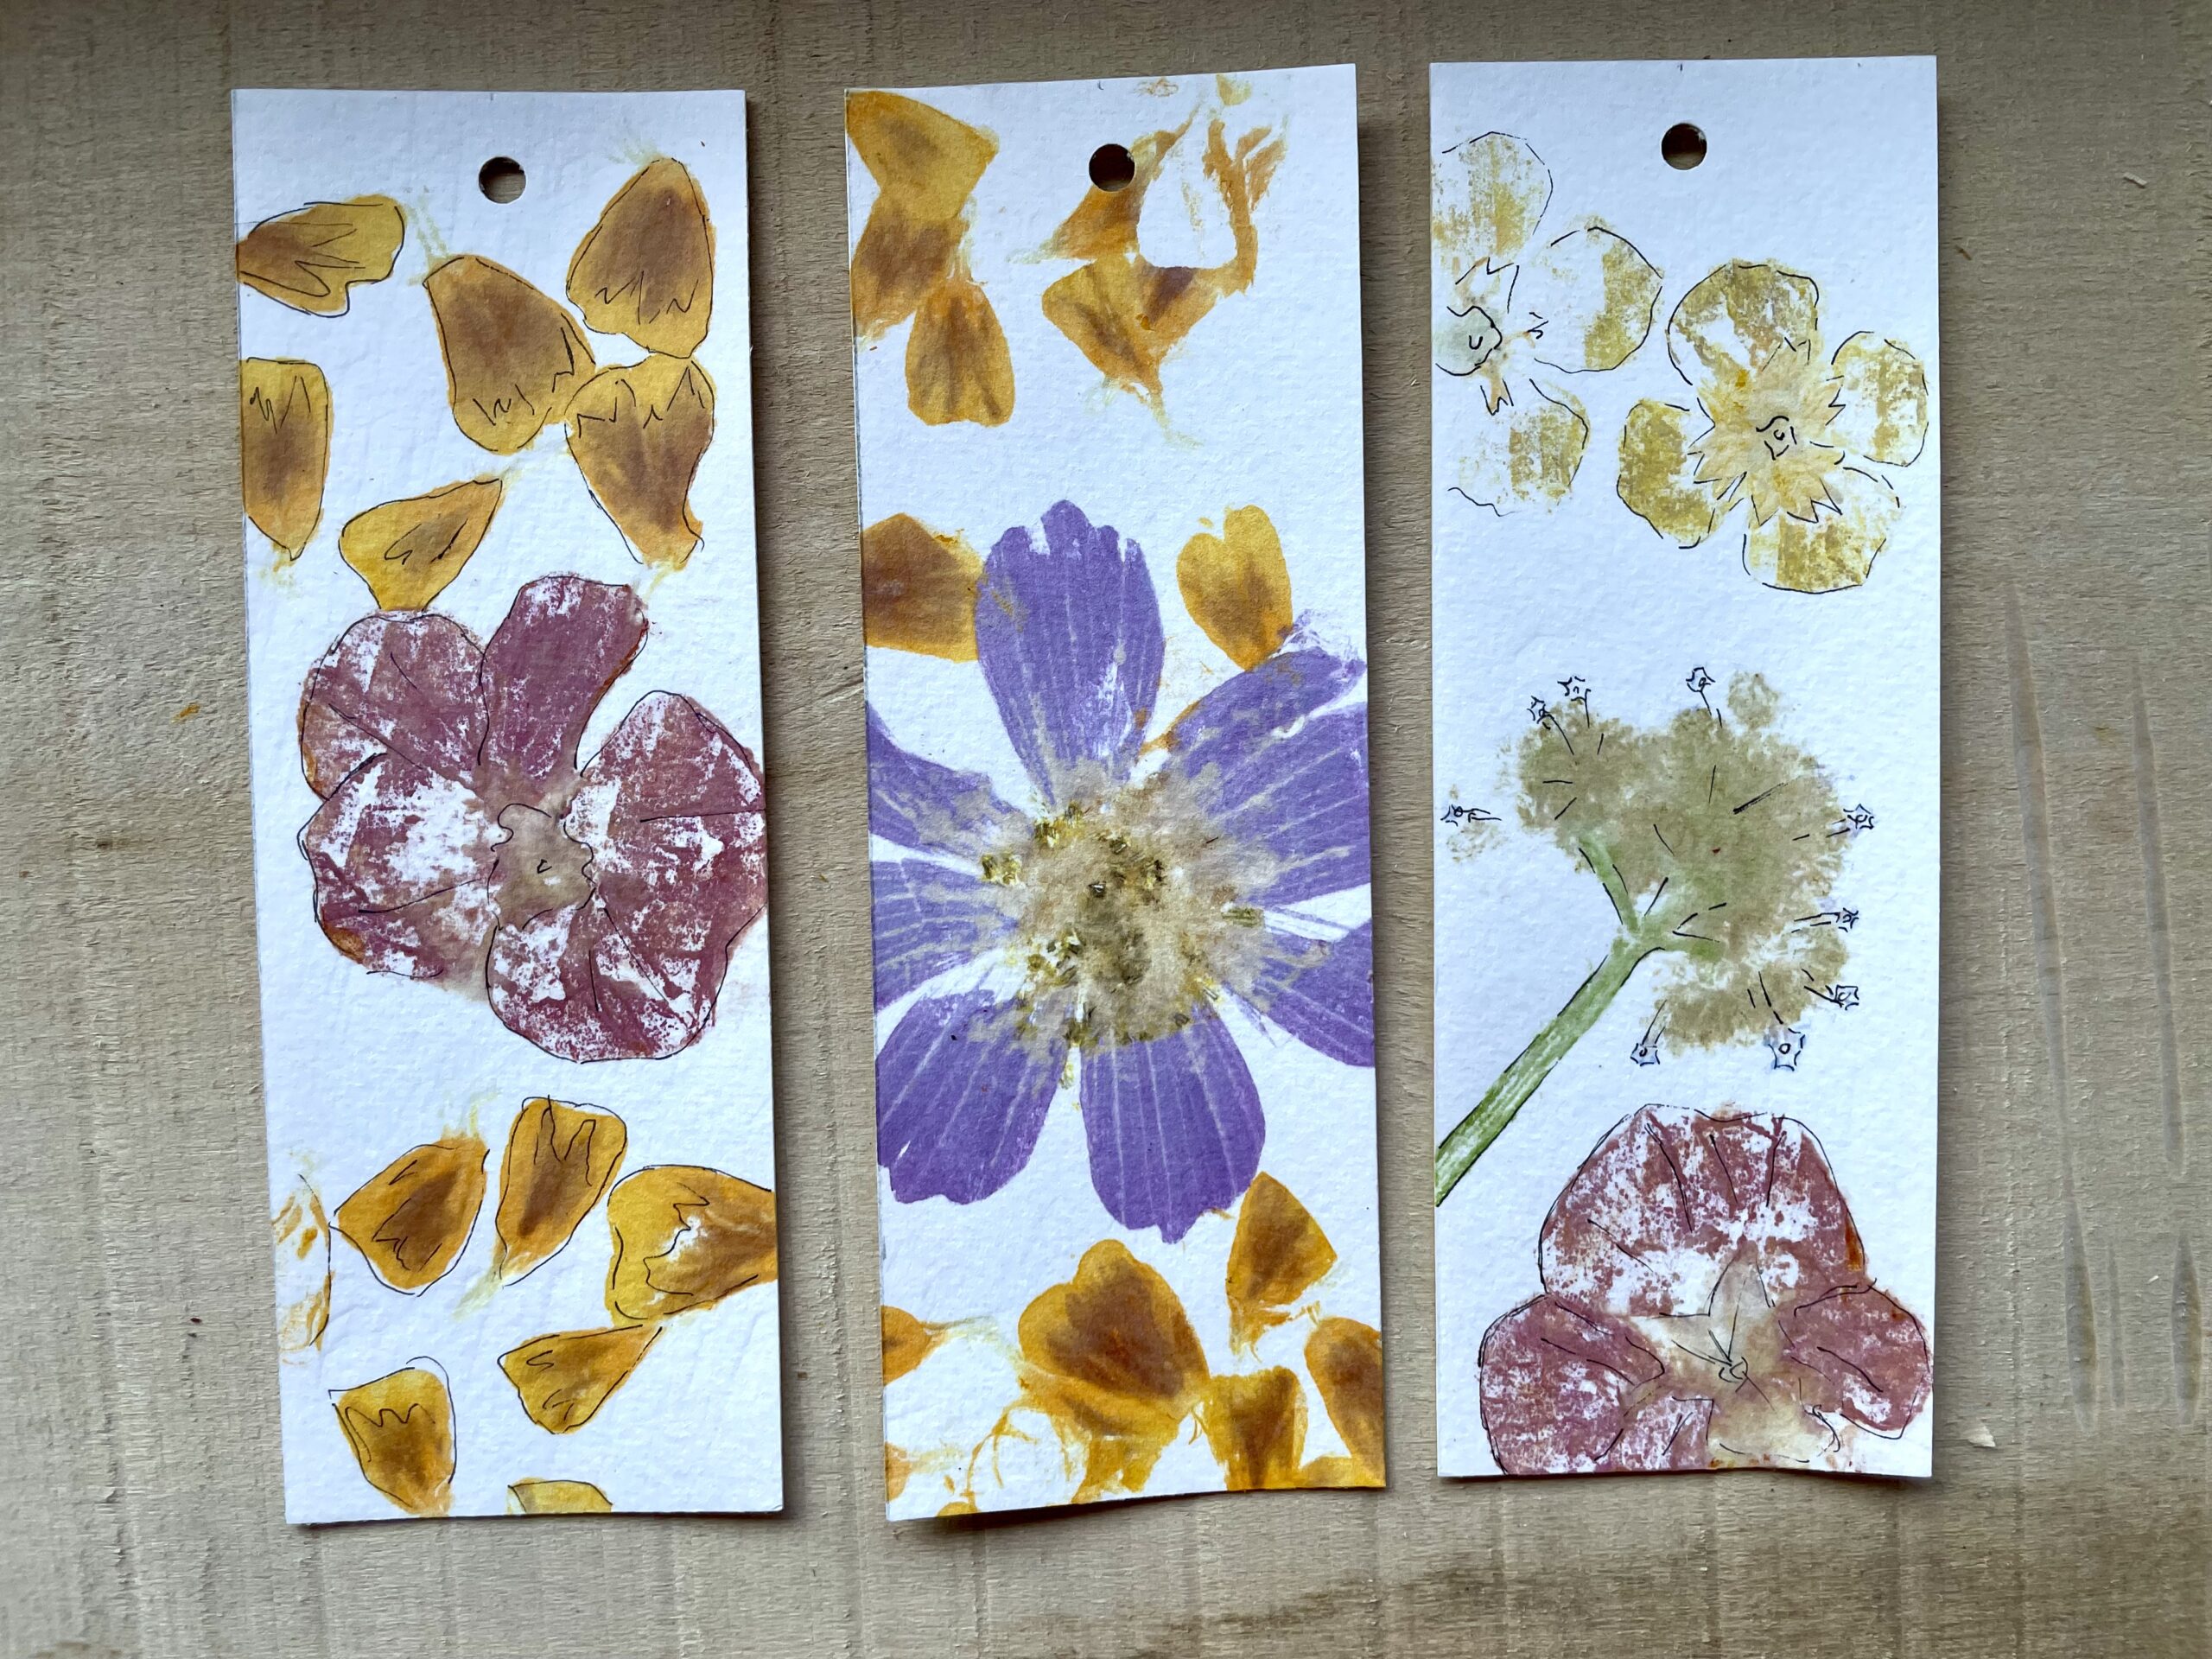
After a bit of a rainy July the cosmos, verbena and marigolds in my garden have put on a beautiful display so much so that I thought this month’s printing technique I wanted to try flower hammering to preserve those vibrant colours. This technique is just as it sounds. A hammer (preferably ball- or cross-peen) is used to pound leaves and flowers to release their natural dyes which are then captured onto an absorbing medium such as watercolour paper or cotton fabric. Lay the paper on a smooth solid surface (one that is ok if dented) and on top arrange the fresh flowers and leaves face down as desired. Cover with a blotter (such as kitchen paper towel), this will absorb the excess plant juice. Start hammering, using the flat side of the hammer, in small even taps over the entire area ensuring all parts of the flowers and leaves are hit. Continue small hammering taps until the blotter is filling with plant sap. Remove the blotter and peel away the plant remains to reveal the print. Some plants work better than others, but it is a matter of trial and error to get to know what works best. After letting the print dry I added a few outlines with a fine-point calligraphy pen to make the print more playful. To preserve the print on paper spray with UV-protective acrylic spray. If hammering on fabric use a mordant to help the fabric absorb the natural dyes and then heat set the final design.


